HORSE CAMPING PART II
HORSE CAMPING PART II
Well, it’s good to see you again. For those of you who did not catch the last Canadian Horse Journal, this is the second of three articles on horse camping. The first article dealt with preparing for the trip, this one is about packing up, and the next article will address trail travel, safety, wrangling, and the camp site. Some of the information in this article is a repeat of the first article.
Before we continue, we need to remind you that all horse activities, particularly trail riding and packing horses, are safe only if the horse is friendly and completely desensitized. This means that the horse stands calmly when noisy objects like tarps are rubbed along their backs and ropes are placed around feet, between the back legs, and under the tail. Desensitizing must be done slowly, with caution, and be successfully completed.
Packing up is like following a recipe, and like cooking up a fine dinner, it can be fun. It also gives one a sense of touching history, sharing a common bond with those hardy adventurers who packed supplies while penetrating the wild west, and the guides that still head into wild places each year. And there is a genuine satisfaction in throwing a tight, good looking diamond hitch. It’s like mastering a cowboy-sized rubrics cube. At our packing clinic, first time packers team up with a partner and after an hour of practice often throw a diamond in less than forty seconds, no kidding!
Packing up and taking pack trips is an art and a science that often takes years to perfect, especially with large numbers of horses. The point of this article is not to turn you into an instant packer but to provide a sense of what is involved, and the way of doing things. Pick up a good book and attend a clinic if you want to pursue packing skills. If you are lucky, you may be able to convince an experienced packer to guide you along.
Let’s look at the gear that is needed. You need a rigged packsaddle, pack pad, boxes or pack bags to hang on the saddle, a top tarp and the makings of a top pack which commonly consists of gear bags, bed rolls, or tents.
There are several pack saddle types including the decker, wooden sawbucks, and modern molded plastic saddles. Although we typically use modern saddles with molded plastic bars and metal cross forks, the type of saddle you choose is not as important as the fact that the saddle needs to fit the horse’s back like a glove. Unlike a live rider the dead weight of a pack load sways with each step and to avoid rubs it is critical that the saddle fits properly. Wooden sawbucks commonly have to be shaved to fit the horse. To do this, sprinkle some white flour on the horse’s back, set the saddle gently on the horse where it belongs, remove it, rasp down the white spots, and repeat until the bars are all white, meaning complete contact.
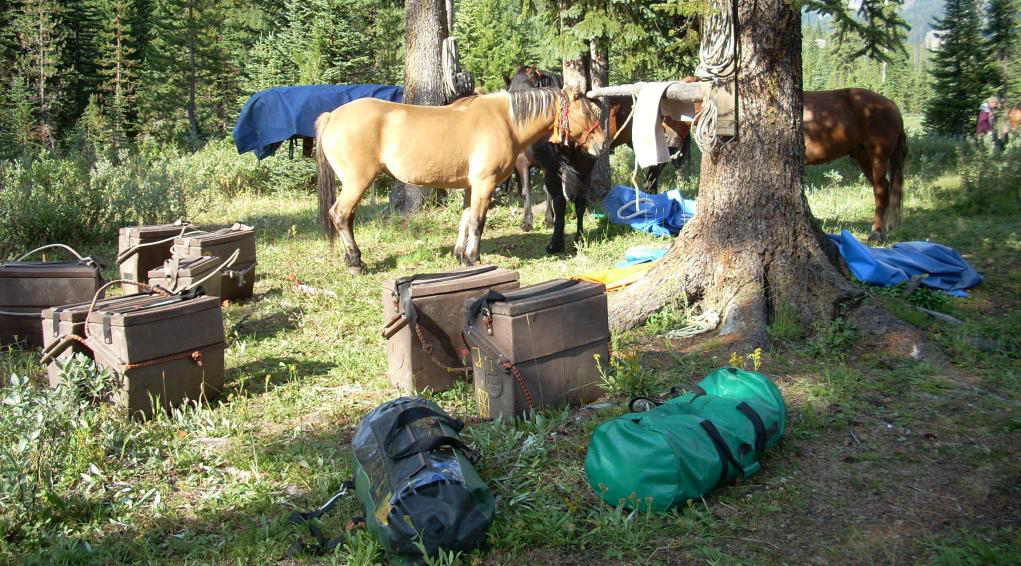
Pack boxes or bags are hung on the forks of the packsaddle, although some traditional packers use a manty load. A manty is basically a rectangle shaped wrapped package of goods slung on a pack saddle, usually a decker saddle. However, more than eighty percent of packers these days use boxes or pack bags. This is because boxes are more durable, can be used for tables or chairs once you reach camp and are easy to balance by simply putting objects from one box into the other and re-weighing. They also take less time to pack, are easier to hitch, sway less, and are less likely to bang into trees, which can be a problem in heavily wooden areas.
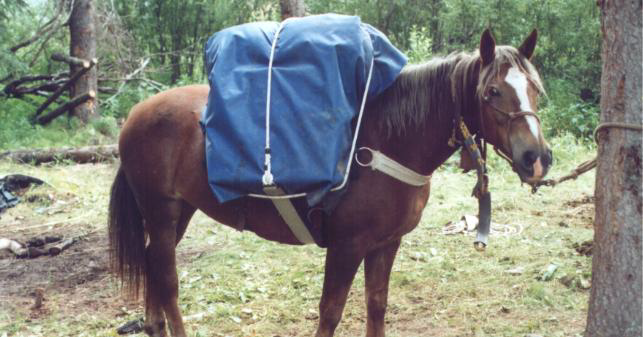
If you do not want to invest in pack boxes for your maiden voyage you can simply use a couple of duffel or hockey bags and learn the basket or barrel hitch to attach them to the pack saddle. The top tarp is a six by seven to seven by eight-foot tough tarp, either canvas or a quiet nylon reinforced vinyl, like truckers use to cover loads. It protects your gear from abuse and weather and helps keep the top load together. The lash rope is commonly one half an inch in diameter and forty to forty-five feet in length. It needs to have some bite so the cheap yellow poly from the hardware store is not acceptable. We also avoid natural materials like manila or hemp as they are terrible to work with if wet and frozen and stretch when wet. Various nylon or polyester ropes work well, if they are not too slippery.
The more you prepare at home, the less trouble packing day becomes and the sooner you can leave. We keep our top loads simple. We use a tough, weather tight, personal gear bag fourteen inches in diameter and about twenty-six inches long, a bed roll, and a tent, for our top packs. The gear bag is prepared at home, the essentials packed and weighed, and it goes from the house to the truck to the horse. Bed rolls are simply sleeping bag covers that have foam or Therma rest in them and are easy to roll up. We often have a small day pack with each rider for extras. It hangs on the saddle horn on the offside or can be worn.
Prepare your boxes at home. They should be at fifty pounds or less (forty pounds or less for first-time packers) and your top pack needs to be less than thirty pounds, for an average sized horse. Always try to make your top load as light as possible, and compact. Bulky, heavy loads on top will encourage swaying and cinch sores and saddle sores. If your gear bags and bed rolls are placed on the top as pairs, and they usually are, then they should weigh less than fifteen pounds each. Opposing pack boxes, gear bags and bead rolls need to be matched in weight, within one pound of each other – 2 pounds is too much.
The size and strength of the horse, the experience of the packer, the difficulty of the terrain, and how long the day is, should affect the size of the load, but a load that is fifteen percent or less of the body weight is a good formula until you gain experience and confidence. It is important to note that pack trips on up and down snaky trails as opposed to relatively level ground trails will result in packs loosening and slipped loads and a greater likely hood of cinch and saddle sores.
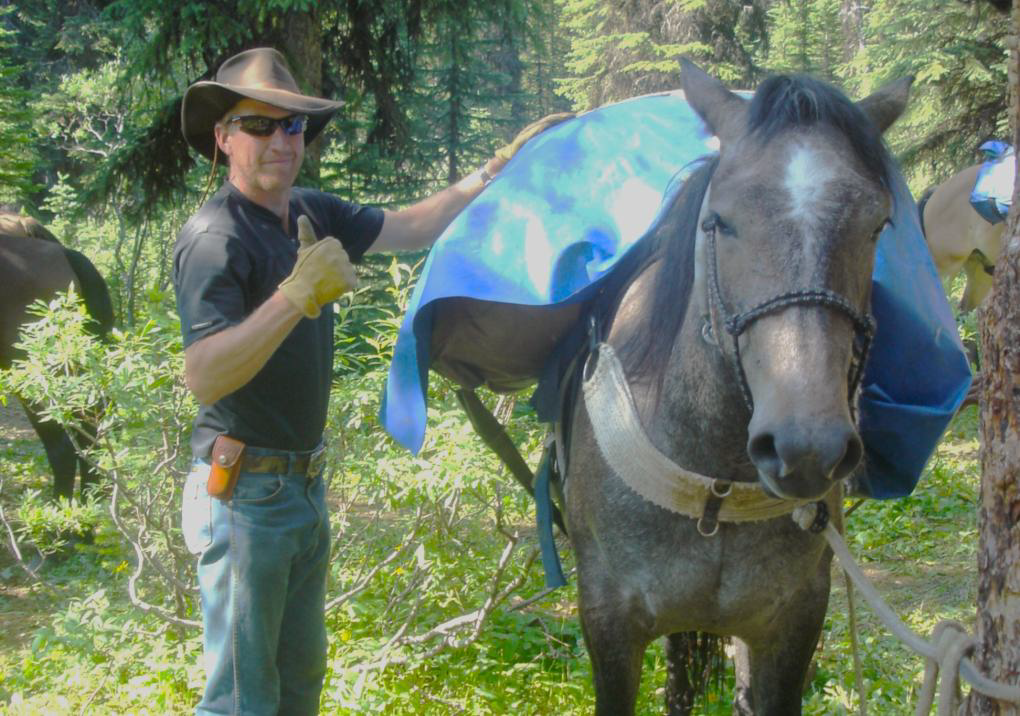
When it’s time to pack up, find a good roomy area to tie up your horses. Remove pointed branches from trees that can poke you or a horse’s eye. Tie horses close to the tree, post, or rail, at eye level. Give yourself lots of space between horses. Tie up riding and pack horses in separate areas so it is less confusing to place gear and make changes. Before packing up place all the gear for each horse behind each horse, including saddles, pads, boxes, top pack, tarp, and lash rope. Saddle up and get your riding horses completely ready to go first, including your cantle pack, saddle bags, trail axe. If you are an experienced packer you might choose to place the bit and tie up reins safely, otherwise place the bit and, if you have one, the gun on, after the packhorse is saddled and packed. This is because you do not want packhorses standing under heavy loads for another half hour while you fiddle with saddling and bitting and loading your saddle horse. Tighten cinch about eighty percent, so the saddle does not slip, will be tightened one hundred percent before you mount up.
Place pack pads and saddles on all the pack horses, again, eighty percent tight until you are ready to place on loads. We use a one-inch-thick wool blend felt pad often with a fleece type soft cover, and a hospital felt pad liner for extra protection. Pad liners are easier to keep clean than the main pad and help reduce friction. The pads are placed in the proper position so that when the packsaddle is placed on, there is more pad out the front then the back of the saddle, at least the width of your hand out the front. This helps the pad from sliding back which is something you really need to watch for as a pack saddle against the packhorse back with no pad is trouble. With the cinch lightly tightened we lift the pad off the horse’s back to allow air circulation. The pads will, in time, shift down against the back but it does help keep things cooler for a couple hours.
The saddle needs to be positioned and adjusted. The front cinch is one or two inches behind the point of the elbow, as with a riding saddle, and the breast collar should have about 2-3 inches of slack if you pull it forward. If you use a britching (the band around the horse’s rear quarters), it should be adjusted so that it is five inches below the point of the hip and 3-4 inches of slack when you pull back.
There are many details that will help your load travel properly through the course of a long day including the positioning of the top pack and the positioning of the boxes or bags. A good book or video will help your understanding of these important details. Blue Creeks Trail/Packing book and video is the most complete book and video available (see www.vistapublishing.net). Whether a recreational rider or a professional you always need to be thinking light, trim, tight, and evenly balanced. Do not even think of heading out if your panniers (pack boxes) are not matched in weight, ditto for the top load.
Now let’s look at securing your load with a hitch. There are two categories of hitches; those that hang stuff on the packsaddle and those that wrap the entire load to the horse. The most common hitches that hang stuff on the pack saddle, be it pack boxes, gear or hockey bags, bales of hay, firewood, etc. are the basket hitch and the barrel hitch. The category of hitches that wrap the entire load to the barrel of the horse include the diamond hitches, box hitch, square hitch, squaw hitch, ring hitch, and more. There are more than twenty variations of the diamond hitch alone!
Hitches are personalized, and a person’s choice may be closely tied to the person who taught them the hitch, someone they care about. If you learned the hitch from Uncle Joe you will likely defend the hitch as the best choice, when, in reality, many hitches can do the job. But there are some differences between hitches. For example, a double diamond is great for tall horses or short people as one does not have to go up high to tie it off. The standard single diamond, our favorite, is the best when two people want to tie a lightning-fast hitch for a variety of loads. And yet, the one-man single diamond is likely North America’s most widely used hitch, particularly in the USA.
I remember one cold October day in some remote and rugged piece of northern B.C. We were packing out for the season. The days were short, and the horses were many. I remember the frustration watching a packer packing only one horse with a one-man diamond while a partner and I packed four during the same time. Being hardheaded can be an advantage for us bush guys, but not always. The bottom line is that the hitch needs to secure the load tight for the duration of a tough day and most hitches can be used successfully. It’s not the hitch but how you throw it, meaning the rope needs to be positioned properly and TIGHT.
Although our most used hitch is the standard single diamond because it is lightning fast with two people, versatile for a variety of loads, and is truly poetry in motion, the double diamond is easier to throw for one person when packing a tall horse, or if you are vertically challenged. If the hitches look difficult in pictures, don’t worry, it becomes much clearer with the horse standing beside you and a lash rope in your hands. I am already looking forward to the next issue and all the great trail tips that we can share.
Happy Trails!
No matter your choice of hitches, they need to be tied properly and TIGHT.
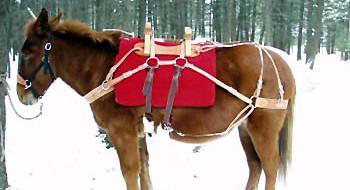
Packsaddles need to fit the horse’s back like a glove when in the proper position. The bars can be sanded or filed down until they fit. Beware of store-bought saddles (above) from the USA as they often fit mules but do not fit horses very well. We prefer a crouper as opposed to the britch’n used above. See Custom Packrigging’s saddles from BC, Canada.
When stopping for the night, tie up all packhorses in one location and all riding horses in another. In the morning, tie up horses in the same position. Place all the gear behind each horse, that will be loaded on that horse, saddle horses and pack horses both, completely laid out ready to go, before saddling and packing up. If you do not, then you will have horses standing around fully loaded while you are searching for missing gear. Get riding horses saddled and ready before placing on boxes and throwing hitches.
When choosing your first set of gear, go with pack boxes (panniers) as opposed to using gear bags or a manty system. They are tougher, will last longer, protect goods better, and can be used as chairs and tables.